Getting ready for my new role at HM, I thought it was about time to reinvigorate my personal website. You’re looking at the result – and this blog post describes the technical setup I opted for.
I’ve always enjoyed web development (in fact, I've enjoyed it way before I became good at it) and for my personal website, I started with manually edited HTML & CSS, later based on Bootstrap, and eventually ended up – like most of the web at that time – with a Wordpress site including a little blog. But I’ve long since returned to appreciating the simplicty, maintainability, and security of a static site, as well as the elegance of authoring in Markdown. So I googled (old school, I know) to have an updated look at existing tools meeting my requirements for the blog setup.
The requirements were:
- only open source tools (I'm making an exception for Obsidian – separate topic)
- static site deployed via Github actions
- static page and blog support
- authoring posts in Markdown (ideally directly in Obsidian)
- minimal but elegant style
- support for code with syntax highlighting (I'll be teaching programming, among other things)
- support for math using LaTeX syntax
I first leaned towards Jekyll, which I’m using for the Grampshub Blog, but then discovered Hugo, which I quickly fell in love with, especially in combination with the simple but elegant Hugo Book theme.
Hugo has built-in support for math
$$\mathcal L\supset-\frac{1}{4}F_{\mu\nu}F^{\mu\nu}$$and syntax highlighting
print("Hello World! 😄")
so most of the requirements were already covered, I just needed to tweak the styles a bit to my liking.
The outstanding issue was a workflow for authoring, deploying, and hosting the site.
For hosting, I decided to use Github pages since it’s trivial to combine it with an automated deployment via Github actions. Here is the action I use, publishing a new version on every git commit. Setting up my existing domain to point to the Github pages site was straightforward, following the step-by-step guide in the documentation.
Using Github pages has the added benefit that you can even submit pull requests to my website if you spot a typo and I can redeploy automatically by clicking the merge button.
Now the missing icing on the cake was being able to author blog posts directly in Obsidian (my second brain) and to deploy them automatically without the need to git commit and push. Not because I plan to become a daily blogger, but simply because I enjoy automation.
The first step was to create an Obsidian template with the necessary YAML frontmatter. I use the following template:
---
title: Title
date: <% tp.date.now("YYYY-MM-DD") %>
draft: false
tags: []
categories:
  - Tools
---
Once the post is written, the Markdown file needs to find its way into the Github repository. Inspired by a blog post I found, I started playing with the Shell commands plugin and had the idea that I could use the Github API to push a new post to my repo without manually committing it locally.
I vibe coded hacked together a simple Python script that uses httpx to push a single file to a Github repo using a personal access token. You can find it in this Gist.
I am keeping it in the Scripts folder of my Obsidian vault and invoking it with the following Obsidian shell command:
python3 Scripts/md2gh.py {{file_path:absolute}} --token my_PAT --owner MyUserName --repo my-repo-name --folder content/posts
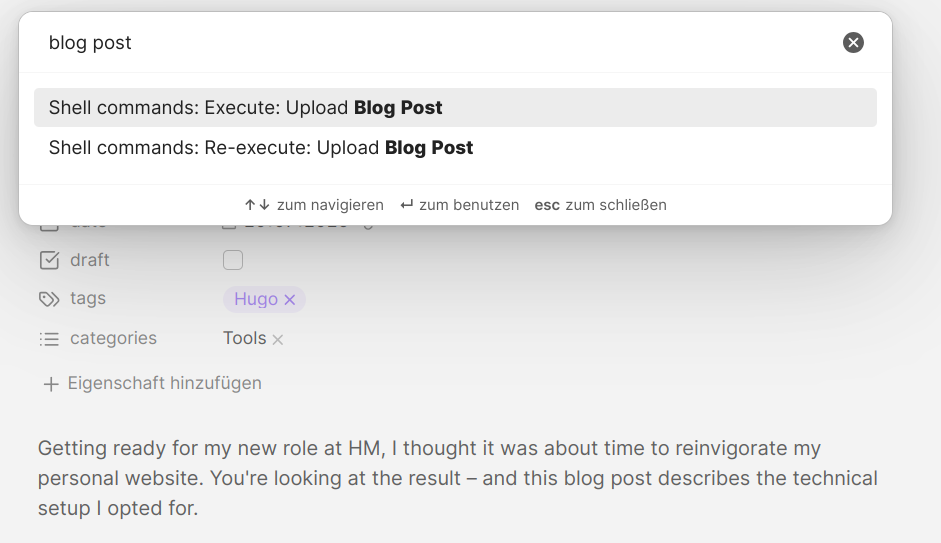
I can now publish a Markdown post by hitting Ctrl + P and selecting “Upload Blog Post” to automatically publish the new post to my website without any further clicks.

The last step was to decide how to handle images in posts. Adding the images locally in Obsidian, it becomes a pain to commit them to the repository as well, and to make sure relative paths work on both ends. The simplest solution is to upload the images somewhere and use the remote URL directly in Obsidian (caveat: using proper Markdown image syntax  rather than wikilinks [[...]], as the latter do not work with Hugo). Regarding somewhere, I found postimage to be a hassle-free option – it literally takes a single click to upload the image and a second click to copy the preformatted Markdown.
To summarize, here are the steps I followed to create & deploy this post:
- Select “create new note from template” from the command palette and use the “blog post” template
- Write the post
- Upload the image to postimage and insert the resulting Markdown in the post
- Execute Obsidian shell command “upload post”
Voilà! Here’s a setup I’m happy with.
At least for now.